Expandable Banners uses a custom built JavaScript library built from the ground up by our team of expert JavaScript developers.
It will not conflict with any jQuery or other JavaScript elements you might be running on your website.
Banner Rotator & Tracking Systems
Compatible with DFP, OpenX, Adtech, Open Ad Stream, Adzerk, and many other banner tracking systems.
We also provide you with a banner tracker that tracks your impressions, opens, clicks and CTR.
As long as you can edit the HTML for the banner in your system, our expandable banners will work for you.
If you are using a banner tracking system different than the ones mentioned, our developers will try our best to integrate the media kit into whatever system you are using.
Compatible with all major web browsers and mobile devices.
![]()

If you need to track your clicks in DFP you must use the Stand-alone version. (Even if your website is using WordPress)
You cannot use the image to image banners, (DFP does not like the A Tag.) Therefore all banners must be HTML banners.
Expandable Banners Integration
Step 1.
Create New Order
- Manually add 728 X 500 as a custom size dimension (Or whatever is your larger expandable banner size)
- At the bottom of the page click Save & Upload Creatives.
Step 2.
Click on the Third-Party option then copy and paste the HTML code for your Expandable Banner. Remember we must use an HTML Banner.
Here is the code for a basic HTML Banner that looks like an image banner.
<script src="http://www.yourwebsite.com/expandablebanners/expand.js"></script>

<script>
var yourbanner = ExpandableBanners.banner("yourbanner", '<a href=|http://www.website_to_link_to.com/| target=|_blank|>
<div style=|background:url(http://www.yourwebsite.com/larger_banner.jpg);width:728px;height:500px|></div>
</a> </div>',728,500);
yourbanner.setCloseImage("images/closebutton.jpg", 'right', 'bottom');
yourbanner.animated = true;
yourbanner.setDirection('down', 'center');
yourbanner.expandOnClick = false;
yourbanner.animationSpeed = 0.4;

if (document.addEventListener) {
document.addEventListener("DOMContentLoaded",function(){documentReady=true;});}
else if (!window.onload) window.onload = function(){documentReady=true;}

</script>


<div id="yourbanner">
<div style="background:url(http://www.yourwebsite.com/small_banner.jpg);width:728px;height:90px"></div>
</div>
When adding the HTML code into the JavaScript all of the quotes turn into seperators.
So this:
<a href="http://www.website_to_link_to.com" target="_blank">
Turns into this:
<a href=|http://www.website_to_link_to.com| target=|_blank|>
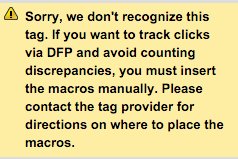
If you see this message, you can still continue but your clicks won't be tracked.

If you want to track your clicks you must enter click macros which would go here.
%%CLICK_URL_UNESC%%http://www.yourwebsite.com
So the first variable would look like this.
var yourbanner = ExpandableBanners.banner("yourbanner", '<a href=|%%CLICK_URL_UNESC%%http://www.website_to_link_to.com/|
target=|_blank|><div style=|background:url(http://www.yourwebsite.com/larger_banner.jpg);width:728px;height:500px|></div>
</a> </div>',728,500);
You can read more information about this here.
https://support.google.com/dfp_premium/answer/1242718
The section we are using is call "Click macro"
Step 3.
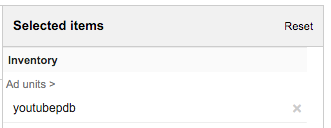
Click on Inventory - Create New Ad Unit "Name it anything"
Step 4.
Manually add 728 X 500 as the dimensions (Or your LARGER banner size)
Step 5.
Click on Adsense override,
![]()
So that the section looks like this (Do not click the checkbox)
Step 6.
Once the New Ad Unit is created, go back into your order and into the automatically created "Line Item"
Delivery > Your New Ad Unit > Your Line Item
Scroll to the bottom of the page and click on "Ad Units"

Then include your Ad Unit

Done.
Step 7.
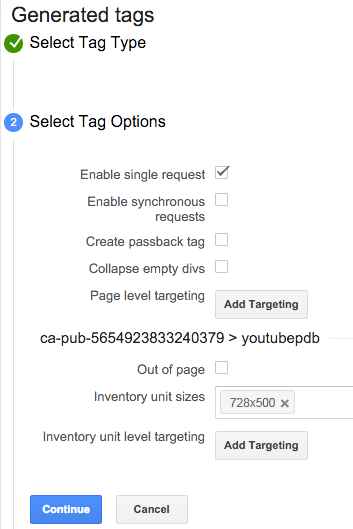
Click on Generate Tags then find the Ad Unit "Name it anything" and include it.

After that click on generate tags
Step 8.
- Use the Google Publisher Tag

Then just copy and paste the code to a test HTML page.
Step 9.
- Edit the DIV layer CSS given from Google.
- Instead of
<div id='div-gpt-ad-1452715466262-0' style='height:500px; width:728px;'>
Change it to the smaller banner size:
<div id='div-gpt-ad-1452715466262-0' style='height:90px; width:728px;'>
Step 10.
- Wait about 2 hours for the new Ad Unit and Tags to deploy onto your site.


